
So, WOW.
It’s done.
Done as in done done. ALL done!

Signed, sealed and delivered to the client and the restaurant owner. I have to admit it was a huge rush to see their reactions in person. I could not have asked for a better response. They loved it. The owner hugged me about 10 times. I left the restaurant floating on air.
It wasn’t a hard finish since last week, but there were many steps to it. I’ve had this strong vision in my mind since the very beginning of the project and it’s just been a step-by-step execution. I’m feeling very blessed to have a client that believed in my vision too and had wonderful feedback to guide my way.
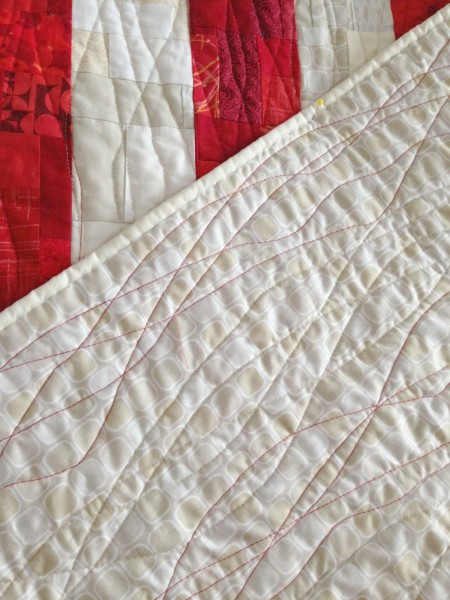
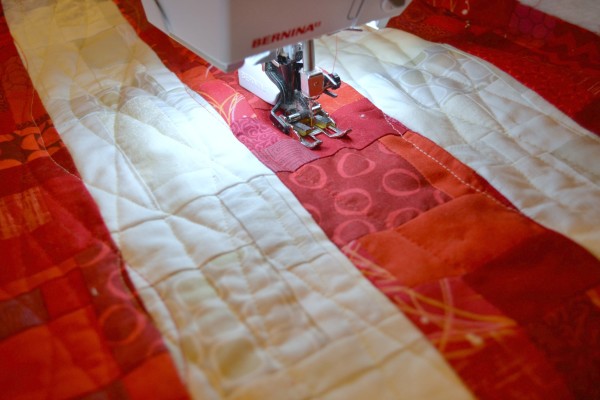
Last week I was finishing up quilting the stripes with organic wavy lines. I was worried about it being boring and tedious but it turned out to be more engaging than I expected. It went faster than I thought, too, which was nice.
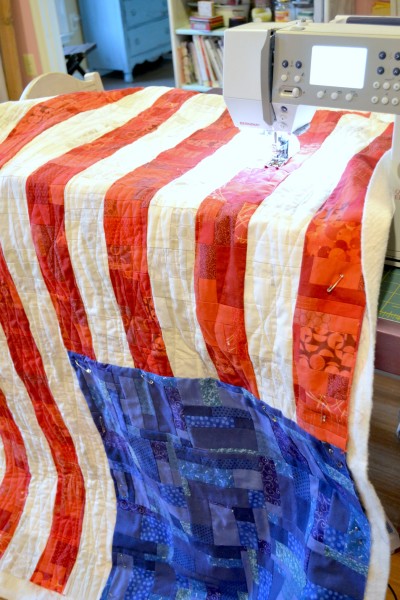
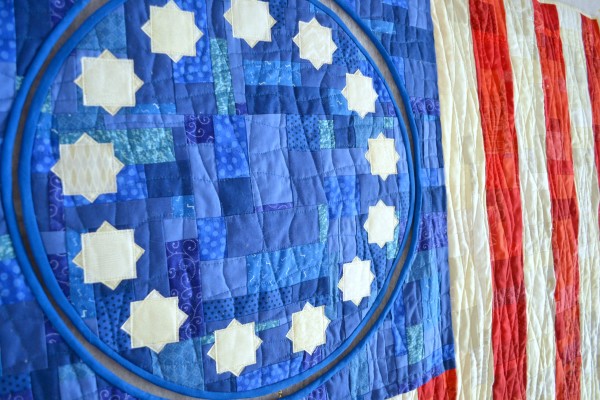
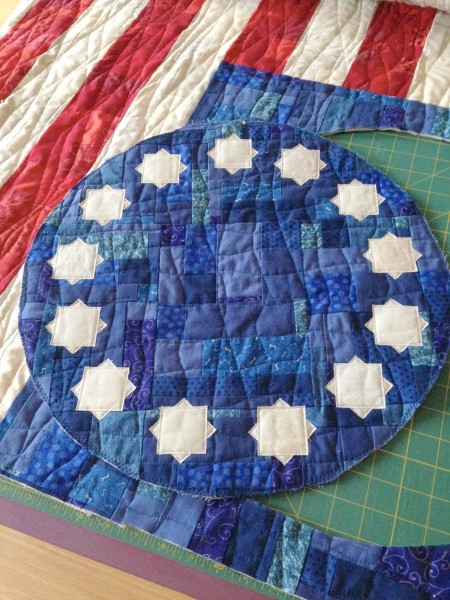
I then moved onto quilting the blue field in the same wavy lines, but I used a cross-hatch pattern instead, to set it apart from the stripes. Once the whole thing was quilted, I trimmed it to the final size (42” x 66”) and bound it in the same color as the frame it would hang in. I wanted the effect of the quilt edges disappearing, so I requested a paint chip from the client to match up with my binding fabric.
I’d sent over pictures of a few different star options and the client picked an eight-pointed star, constructed of two overlapping squares. I used squares to reference the piecing technique, and the chunkiness of the stars made them more visible from far away.
But before applying the stars, I had to remove the circle from the quilt. Which meant cutting the quilt apart. My precious, pieced-over-many weeks quilt. I was about to hack away at it with a rotary cutter. Scary, scary stuff.
Now I’ve done this before, I’ve made a few of these kinds of quilts before. But of course I’ve never cut up a quilt that’s taken me weeks and weeks to make, let alone one that was due to a client in a few days.
So I measured and drew and measured some more and measured some more again to make sure I had the circle size and placement exactly right.

And then I took to it with my rotary cutter.
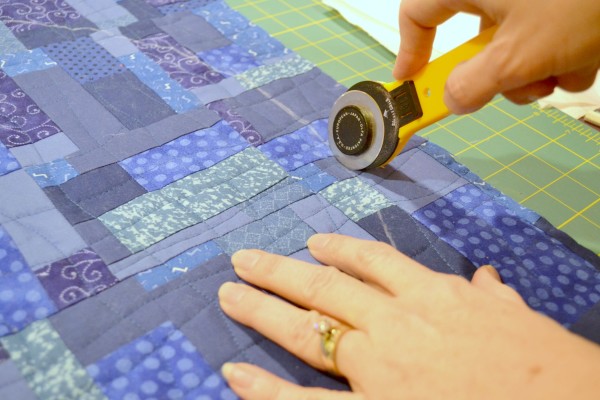
Yes, it was every bit as scary as you think it was.
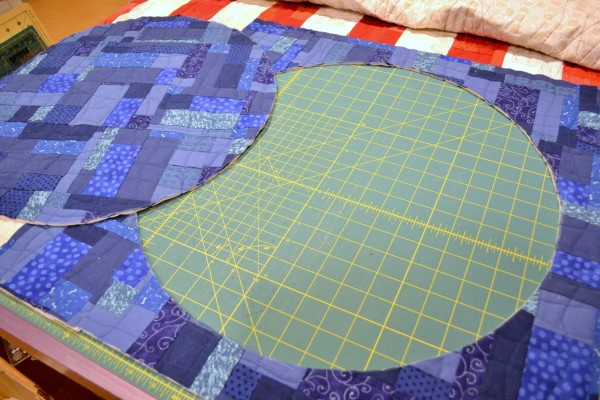
But the cut went well and I moved onto making the stars. More measuring, lots and lots of measuring, hours of measuring (for real!), along with shooting photos from above and looking at the effect on the camera.
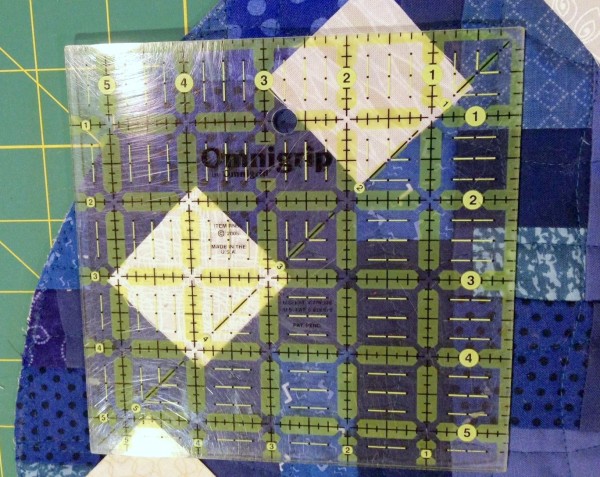
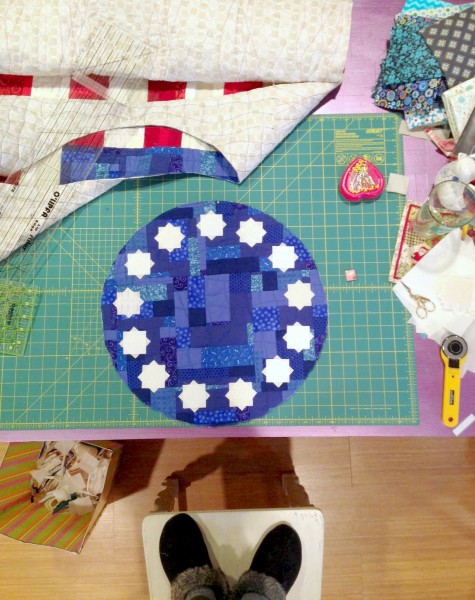
Finally satisfied with their placement, I carefully applied them to the quilt with fusible web and secured them with raw-edge appliqué stitching.
I bound the outer edge of the star circle and the inner edge of the cut out section of the quilt with solid blue bias binding. Applying the binding is a two step process - first machine stitching it to the front raw edge, then folding it back and hand stitching it to the back.
At this point, I only applied it to the front, because I had to add a hanging sleeve to the back and I wanted to make sure I had enough room for that.
Adding a hanging sleeve isn’t hard, but this sleeve had to fit the hardware that the client hadn’t yet purchased, so that made things interesting.
We chatted on the phone (the one and only time!) to discuss hardware options. The client was going to shop that night and let me know her decision in the morning, and I was to make a custom sleeve to her specifications.
Now if I’m being honest, this somewhat terrified me. My quilt math is sketchy at best and this required precise calculations. If the sleeve was too small, the hanging rod wouldn’t fit into it. If it was too big, the extra slack would roll the rod too high, making it visible above the top of the quilt.
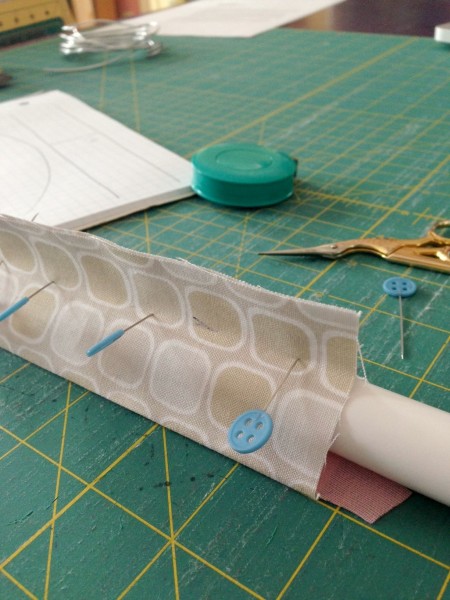
The client emailed me the size of the rod she chose and I rolled and taped a piece of card stock to the same diameter. This was my prototype and I puzzled, measured, drew, folded, measured again, drew again, and finally pinned and sewed it up. I slid my rolled card stock tube in and it fit perfectly. Relief!
I constructed the actual sleeve and hand sewed it to the top of the quilt. Once it was secured, I made the wire framing for the inside and outside circles, tacked it on, and closed up the binding.
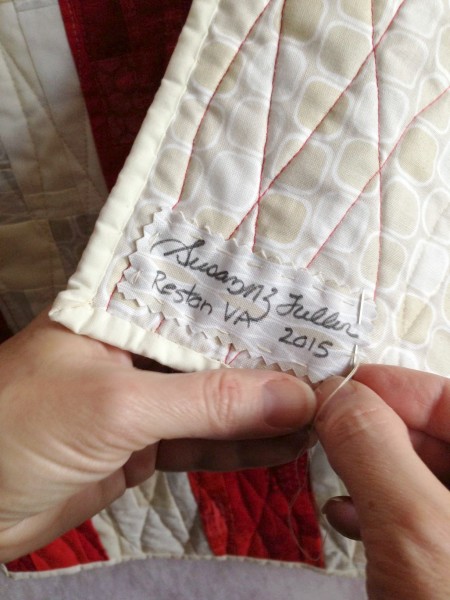
The only thing left to do was label and deliver it!
The next day was surprisingly emotional for me when I realized this was the last day this flag would hang in my art room. It felt great to have it finished, of course, and in some ways a relief to no longer have to worry about something happening to it, but still, I knew I’d miss seeing it.
Winnie and Aster helped with the photos before we very carefully packed it up into a cardboard portfolio and taped it shut. They had the sweetest, most thoughtful things to say to me about finishing it up. We may have even shared a long, giggly group hug (but don't tell them I said that).
I drove to the restaurant, parked, and walked in. The place was a flurry of activity with teams of people working all over as I paused in the entryway. It took me a good few minutes to remember that no one was going to walk up to me and seat me. Doh!
I found my client and met her for the first time. She introduced me to the restaurant owner, who greeted me with a big hug and eagerly took me over to a big, empty table to open the cardboard folio, but not before someone quickly grabbed a damp cloth and wiped down the table.
I untaped the cardboard and the client helped me spread the quilt over the table. People that had gathered around started smiling and ooohing and aahhhing and several people were snapping pictures - pictures of the quilt, pictures of me, pictures of people admiring the quilt It was so cool! Then the owner grabbed me in another big, warm hug. He loved it.
I couldn’t have asked for a better reaction. Honestly, truly.
They showed me the frame in which it would hang prominently in the front room, with spotlights. Spotlights! On my quilt! I’m pretty sure it’ll be visible from the street, though I’m not totally sure yet.
The hanging hardware had not arrived yet, so they couldn’t install it. I asked if I could come back for that, and they happily agreed. That’s scheduled for next week.
They’re still keeping the design of the restaurant tightly under wraps, so I couldn’t take any pictures, and I still can’t say what the name of the restaurant is. Soon, soon, soon, though, I should be able to spill the beans! And you know I will!
In case you missed the previous installments of this series: